文章内容
2019/3/16 14:28:21,作 者: 黄兵
Ubuntu 设置密钥登陆
使用密钥登陆一个是防止暴力破解,第二个不需要记住密码。所以基于以上两点,在服务器上设置了使用密钥登陆。
这里习惯了AWS的pem格式文件登陆,这里也设置成这种登陆方式:
具体操作步骤如下:
1、制作密钥对:
使用ssh-keygen生成密钥对:
ssh-keygen [-t 密钥种类] [-b 加密位数]
ssh-keygen -t rsa -b 4096 #生成一个4096位的RSA密钥对
之后按照下面输入:
Generating public/private rsa key pair.
Enter file in which to save the key (/root/.ssh/id_rsa):  #保存密钥对的位置,直接回车即可
Enter passphrase (empty for no passphrase):    #设置密钥对的密码,这里不设置,直接敲两下回车即可
Enter same passphrase again:
Your identification has been saved in /root/.ssh/id_rsa.
Your public key has been saved in /root/.ssh/id_rsa.pub.
The key fingerprint is:
xx:xx:xx:xx:xx:xx:xx:xx:xx:xx:xx:xx:xx:xx:xx:xx root@CentOS
The key's randomart image is:
+--[ RSA 4096]----+
|    Eo+.         |
|     *.o         |
|  . o O +        |
| . o B + o       |
|  . * o S        |
| . o o           |
|  . o            |
|   . .           |
|  ...            |
+-----------------+
#创建密钥对完成
之后在指定的目录下面会生成两个文件。
2、使用ssh-copy-id把密钥上传到服务器上面:
具体命令如下:
ssh-copy-id <用户名@主机>
ssh-copy-id -i ~/myPemKey.pub [email protected]
之后会有如下提示:
/usr/bin/ssh-copy-id: INFO: attempting to log in with the new key(s), to filter out any that are already installed
/usr/bin/ssh-copy-id: INFO: 1 key(s) remain to be installed -- if you are prompted now it is to install the new keys
Password:

Number of key(s) added: 1

Now try logging into the machine, with:   "ssh '[email protected]'"
and check to make sure that only the key(s) you wanted were added.
3、设置服务器:
确保~/.ssh目录中的所有内容没有对其他用户赋予写、执行权限。
如果别的用户有了对这个目录的写权限,那么他们就可以自由地往里面添加自己的公钥,然后自由地登录您的账户了!显然不能这样。sshd有个自我保护的功能,当这个目录对其他用户赋予写权限时,公钥认证将不能进行。
chmod -R 600 ~/.ssh
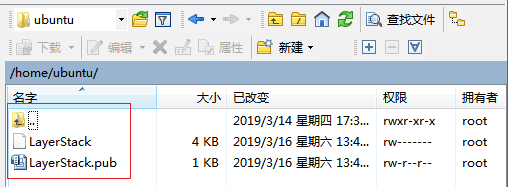
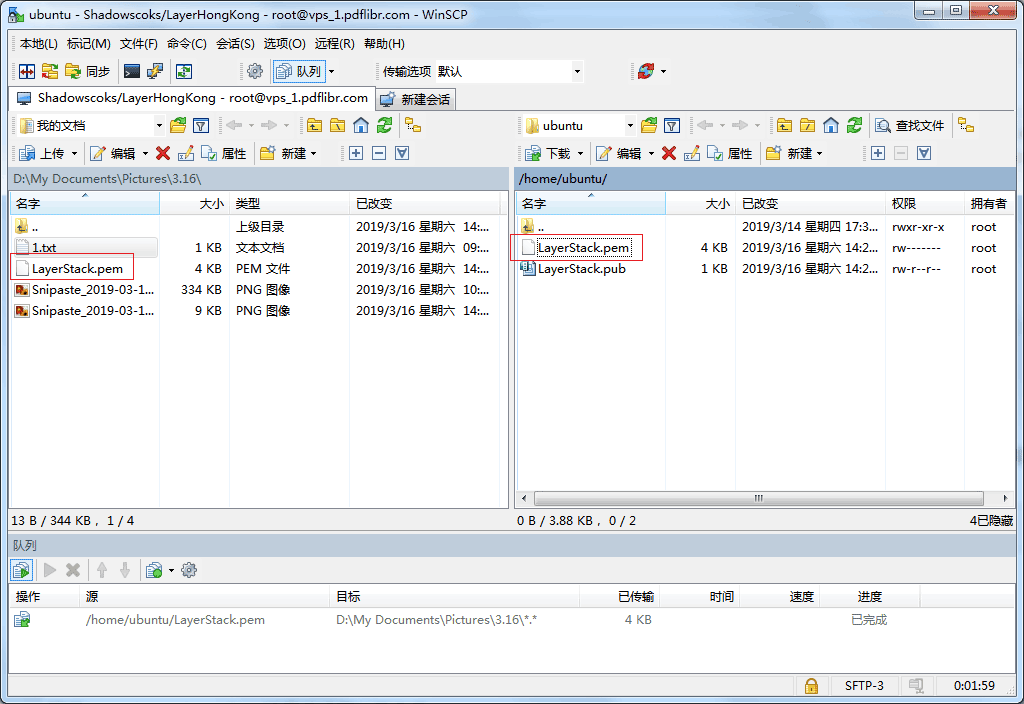
之后把LayerStack文件重命名为LayerStack.pem下载到本地,如下图所示:
4、允许公钥登陆,禁止密码登陆:
编辑/etc/ssh/sshd_config,检查并设置以下选项。
PubkeyAuthentication yes
AuthorizedKeysFile .ssh/authorized_keys
PasswordAuthentication no
设置完成之后,重启sshd服务:
sudo service ssh restart
参考资料:
评论列表