文章内容
2017/10/27 11:06:24,作 者: 黄兵
入门教程: MVC 认证和WebAPI
本文翻译自IdentityServer教程,如感觉有不好理解的地方,请参考原文。
本教程将引导你建立一个基础版的IdentityServer。从简单化角度,本教程将合并IdentityServer和Client到同一个Web程序--这不是真实使用场景,但是可以让你快速了解IdentityServer的核心概念。
请从此处here获取完整代码.
第一节 - MVC 认证和授权
第一节我们将创建一个简单的MVC程序,并通过IdentityServer添加认证。然后仔细了解声明(claims),声明转换和授权。
创建Web应用程序
在Visual Studio 2015中创建一个标准的MVC应用并且设置认证方式为“无认证"。
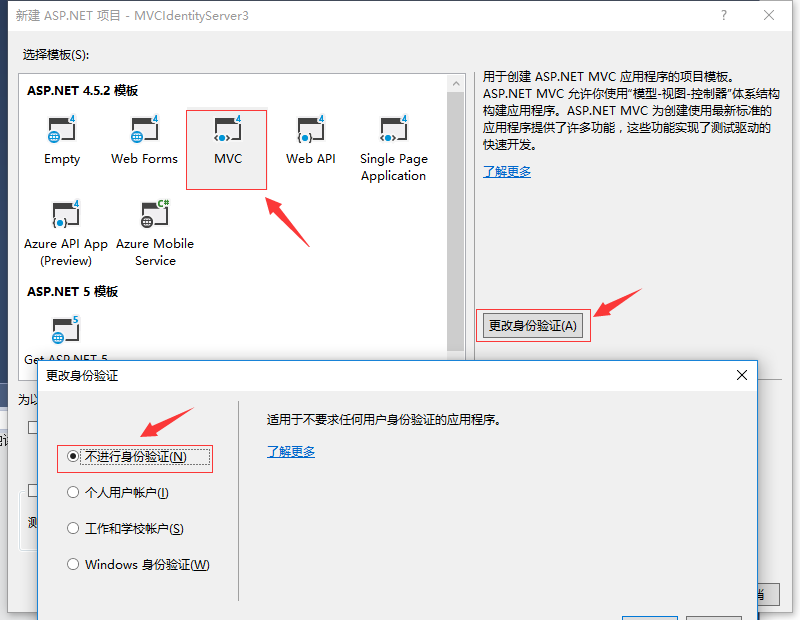
通过属性框把项目切换到SSL:
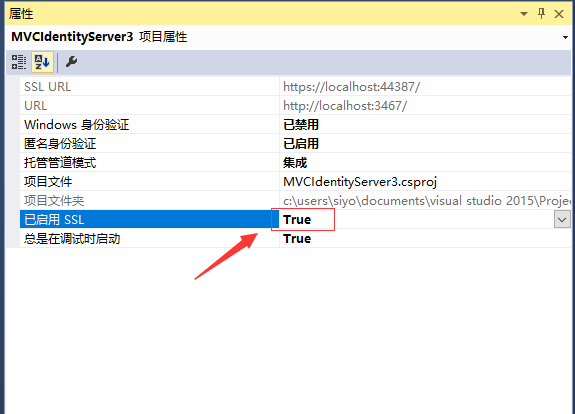
重要
不要忘记在项目属性框中更新启动URL(https://localhost:44387/)。
添加 IdentityServer
IdentityServer 基于 OWIN/Katana 并且通过 Nuget 分发. 用下面的命令在程序包管理器控制台添加对应的包到刚刚创建的的WEB应用中:
install-package Microsoft.Owin.Host.Systemweb
install-package IdentityServer3
配置IdentityServer - Clients
添加一个Clients类,使IdentityServer知道支持的Client(客户)的基本信息:
public static class Clients
{
    public static IEnumerable<Client> Get()
    {
        return new[]
        {
            new Client
            {
                Enabled = true,
                ClientName = "MVC Client",
                ClientId = "mvc",
                Flow = Flows.Implicit,

                RedirectUris = new List<string>
                {
                    "https://localhost:44387/"
                },

                AllowAccessToAllScopes = true
            }
        };
    }
}
注意 当前客户可以访问所有的范围(Scope) (通过AllowAccessToAllScopes设置).在生产环境需要对它限制.后面有更详细解释。
配置 IdentityServer - Users
下面我们会加一些用户到IdentityServer --这里我们直接硬编码一些用户,生产环境应该从其他数据源中获取。IdentityServer提供对ASP.net Identity和MemberShipReboot的直接支持。
public static class Users
{
    public static List<InMemoryUser> Get()
    {
        return new List<InMemoryUser>
        {
            new InMemoryUser
            {
                Username = "bob",
                Password = "secret",
                Subject = "1",

                Claims = new[]
                {
                    new Claim(Constants.ClaimTypes.GivenName, "Bob"),
                    new Claim(Constants.ClaimTypes.FamilyName, "Smith")
                }
            }
        };
    }
}
添加Startup
IdentityServer通过startup类来配置。在Startup类中,我们提供了客户,用户,范围,签名证书和其它配置信息。生产环境应该从Windows certificates store或者类似的源加载证书。简单起见我们直接把证书加到项目中,你可以从这里直接下载.添加到工程中,并且设置为始终复制.
关于如何从Azure WebSites装载证书,请看这里.
public class Startup
{
    public void Configuration(IAppBuilder app)
    {
        app.Map("/identity", idsrvApp =>
            {
                idsrvApp.UseIdentityServer(new IdentityServerOptions
                {
                    SiteName = "Embedded IdentityServer",
                    SigningCertificate = LoadCertificate(),

                    Factory = new IdentityServerServiceFactory()
                                .UseInMemoryUsers(Users.Get())
                                .UseInMemoryClients(Clients.Get())
                                .UseInMemoryScopes(StandardScopes.All)
                });
            });
    }

    X509Certificate2 LoadCertificate()
    {
        return new X509Certificate2(
            string.Format(@"{0}\bin\idsrv3test.pfx", AppDomain.CurrentDomain.BaseDirectory), "idsrv3test");
    }
}我们已经添加好全功能的IdentityServer, 可以通过发现端点(discovery endpoint)了解配置情况
https://localhost:44387/identity/.well-known/openid-configuration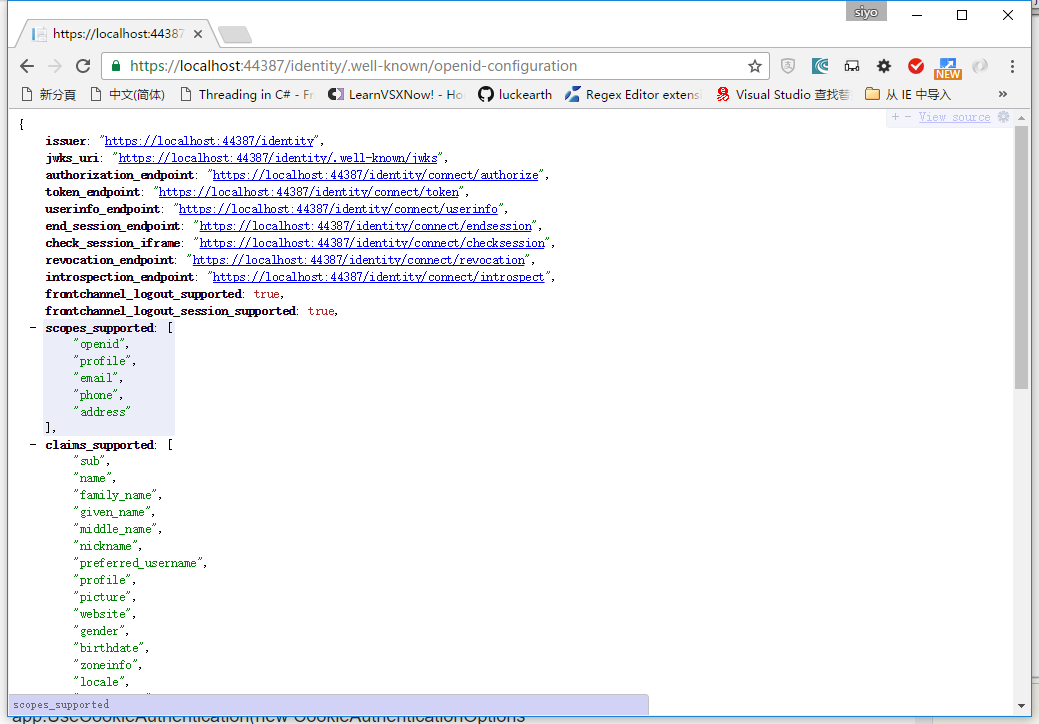
RAMMFAR
最后,不要忘记在web.config中添加RAMMFAR支持,否则有些内嵌的资源无法在IIS中正常加载:
<system.webServer>
  <modules runAllManagedModulesForAllRequests="true" />
</system.webServer>
添加和配置OpenID Connect 认证中间件
支持OIDC认证需要另外两个nuget 程序包:
install-package Microsoft.Owin.Security.Cookies
install-package Microsoft.Owin.Security.OpenIdConnect
在startup.cs中使用缺省值配置cookie中间件
app.UseCookieAuthentication(new CookieAuthenticationOptions
    {
        AuthenticationType = "Cookies"
    });
同样在startup.cs中配置OpenID Connect中间件,指向我们内嵌的IdentityServer并使用我们前面配置的客户信息:
app.UseOpenIdConnectAuthentication(new OpenIdConnectAuthenticationOptions
    {
        Authority = "https://localhost:44387/identity",
        ClientId = "mvc",
        RedirectUri = "https://localhost:44387/",
        ResponseType = "id_token",

        SignInAsAuthenticationType = "Cookies"
    });
添加被保护的资源和现实声明
使用IdentityServer是为了保护一些资源(页面,API)的访问, 本教程中,我们通过全局授权过滤器,简单保护Home控制器的About页面,并且显示哪一个声明(用户)在访问。
[Authorize]
public ActionResult About()
{
    return View((User as ClaimsPrincipal).Claims);
}
对应的View(About.cshtml)修改如下:
@model IEnumerable<System.Security.Claims.Claim>
<dl>
@foreach (var claim in Model)
{
<dt>@claim.Type</dt>
<dd>@claim.Value</dd>
}
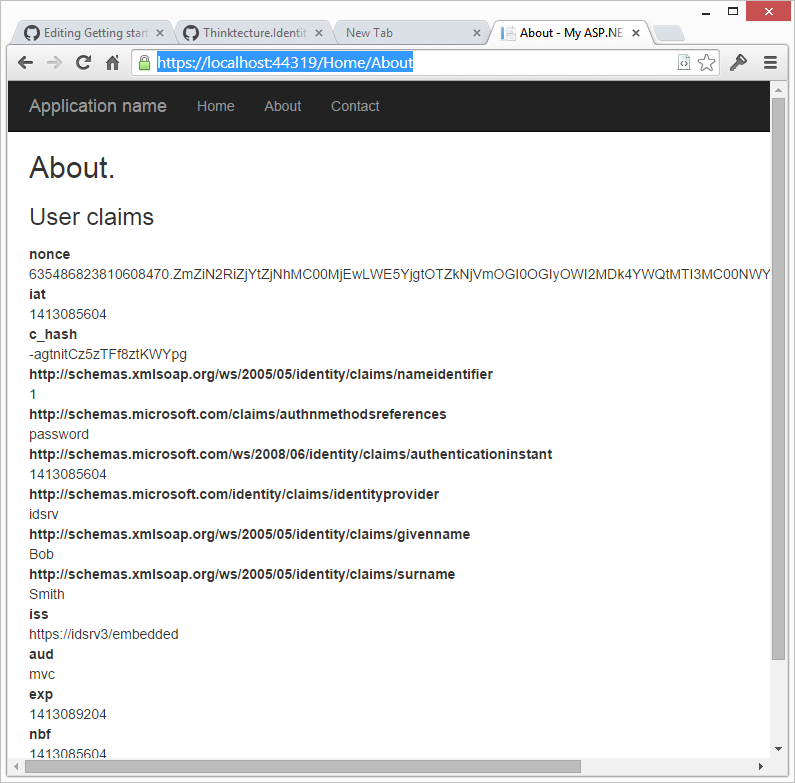
</dl>认证和声明
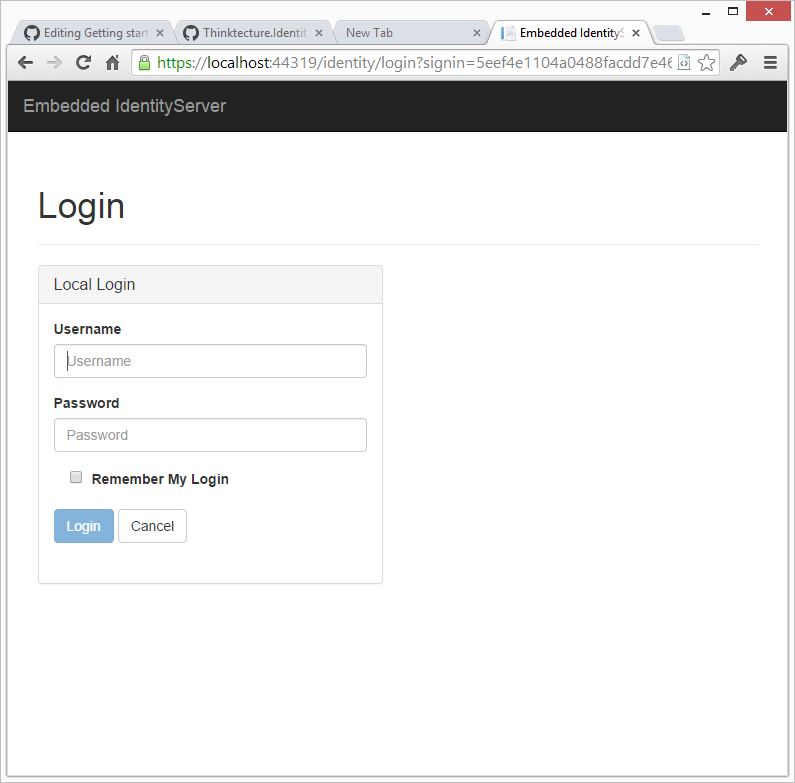
经过上面的设置后,在例子程序的主页上单击关于链接将激活认证机制,例子程序将显示一个登陆界面--用前面硬编码的用户(bob)和密码(secret)登陆后-- 会发回一个token到主程序,OpenID connect中间件验证token,提取声明信息,然后把声明信息传给cookie中间件设置认证cookie。如下图用户现在登陆啦。
译者注此处需要使用https://localhost:44837/来访问,不能使用http,否则会反复认证。
添加角色声明和范围
接下来,我们将添加角色声明来进行授权。
现在我们离开OIDC的标准范围--让我们定义一个包含角色声明的角色范围并且添加到标准范围中。public static class Scopes { public static IEnumerable<Scope> Get() { var scopes = new List<Scope> { new Scope { Enabled = true, Name = "roles", Type = ScopeType.Identity, Claims = new List<ScopeClaim> { new ScopeClaim("role") } } }; scopes.AddRange(StandardScopes.All); return scopes; } }
在Startup中使用新定义的Scope:
Factory = new IdentityServerServiceFactory()
    .UseInMemoryUsers(Users.Get())
    .UseInMemoryClients(Clients.Get())
    .UseInMemoryScopes(Scopes.Get()),
然后我们添加一些角色声明给硬编码的Bob:
public static class Users
{
    public static IEnumerable<InMemoryUser> Get()
    {
        return new[]
        {
            new InMemoryUser
            {
                Username = "bob",
                Password = "secret",
                Subject = "1",

                Claims = new[]
                {
                    new Claim(Constants.ClaimTypes.GivenName, "Bob"),
                    new Claim(Constants.ClaimTypes.FamilyName, "Smith"),
                    new Claim(Constants.ClaimTypes.Role, "Geek"),
                    new Claim(Constants.ClaimTypes.Role, "Foo")
                }
            }
        };
    }
}
修改中间件配置请求角色信息
OIDC中间件默认只要求两个Scopes:openid和profile -- 这就是为什么IdentityServer包括主题(subject)和名字声明。现在我们加上roles范围:
app.UseOpenIdConnectAuthentication(new OpenIdConnectAuthenticationOptions
    {
        Authority = "https://localhost:44319/identity",

        ClientId = "mvc",
        Scope = "openid profile roles",
        RedirectUri = "https://localhost:44319/",
        ResponseType = "id_token",

        SignInAsAuthenticationType = "Cookies"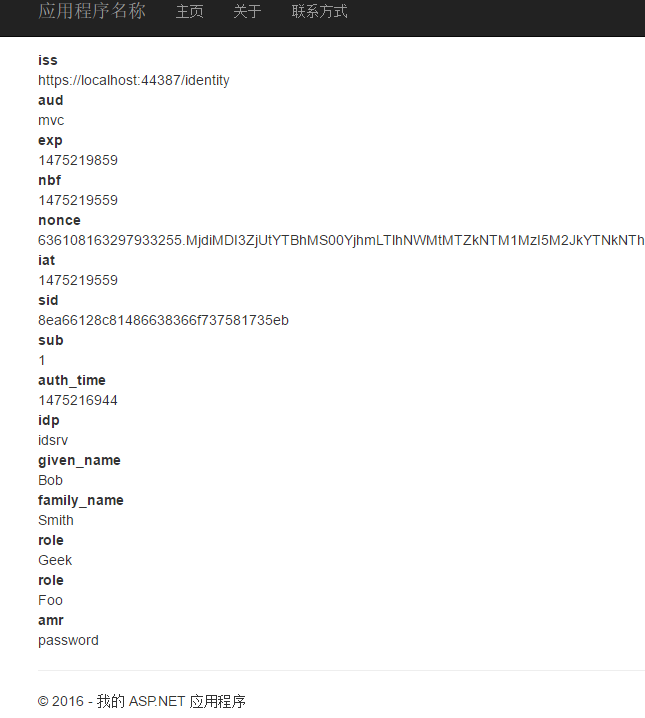
});修改编译成功后,访问关于页面,这是就能看到角色声明啦。

Claims transformation
仔细检查关于页面上的声明信息,有两点引起我们的注意:
- 有些声明带有很长的类型名
- 很多的声明信息我们并不需要.
长类型名是由微软的JWT handler试图把声明类型映射到.Net的ClaimTypes类型上。我们可以通过下面的代码关闭这个功能(在Startup类里面)。关闭这个功能后,对于跨域访问会有些问题,--例子中不会有问题,但是大部分oauth2服务会跨域的--,所以我们要调整反跨站点请求伪造
AntiForgeryConfig.UniqueClaimTypeIdentifier = Constants.ClaimTypes.Subject;
JwtSecurityTokenHandler.InboundClaimTypeMap = new Dictionary<string, string>();
修改后,声明看起来简洁多了:
长长的声明名称没了,但是还有很多底层的协议用的声明,我们并不需要。把原始的声明转换成程序需要的声明叫做声明转换。在这个过程中,我们拿到传入的全部声明,选择那些声明需要以及从数据源中获取更多的声明信息以便程序使用。
OIDC中间件有一个通知机制让我们做声明转换,转换后的声明会保存到cookie中。
app.UseOpenIdConnectAuthentication(new OpenIdConnectAuthenticationOptions
    {
        Authority = "https://localhost:44319/identity",

        ClientId = "mvc",
        Scope = "openid profile roles",
        RedirectUri = "https://localhost:44319/",
        ResponseType = "id_token",

        SignInAsAuthenticationType = "Cookies",
        UseTokenLifetime = false,

        Notifications = new OpenIdConnectAuthenticationNotifications
        {
            SecurityTokenValidated = n =>
                {
                    var id = n.AuthenticationTicket.Identity;

                    // we want to keep first name, last name, subject and roles
                    var givenName = id.FindFirst(Constants.ClaimTypes.GivenName);
                    var familyName = id.FindFirst(Constants.ClaimTypes.FamilyName);
                    var sub = id.FindFirst(Constants.ClaimTypes.Subject);
                    var roles = id.FindAll(Constants.ClaimTypes.Role);

                    // create new identity and set name and role claim type
                    var nid = new ClaimsIdentity(
                        id.AuthenticationType,
                        Constants.ClaimTypes.GivenName,
                        Constants.ClaimTypes.Role);

                    nid.AddClaim(givenName);
                    nid.AddClaim(familyName);
                    nid.AddClaim(sub);
                    nid.AddClaims(roles);

                    // add some other app specific claim
                    nid.AddClaim(new Claim("app_specific", "some data"));

                    n.AuthenticationTicket = new AuthenticationTicket(
                        nid,
                        n.AuthenticationTicket.Properties);

                    return Task.FromResult(0);
                }
        }
    });
最终的声明信息看起来简单多了:
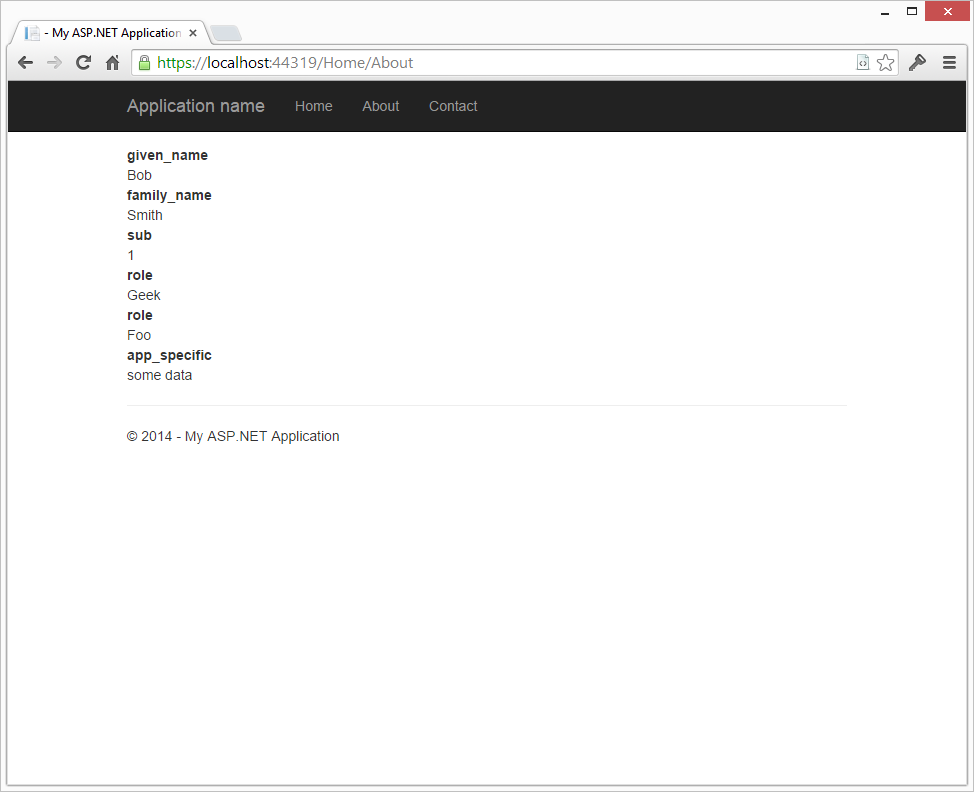
授权
好了,我们现在认证了用户,也有了用户的一些信息,现在我们要加上一些简单的授权规则了。
MVC有一个内置的特性[Authorize],用于标识需要认证的页面(webapi),通过这个特性,我们也可以标识一些角色需求。
我们不建议使用这个特性,它把业务逻辑和权限策略混在一起啦。分离业务逻辑和权限策略可以让代码更清晰,有更好的可测试性。(关于这一点,请阅读 参考文件).
资源授权
添加下面的程序包获得新的授权架构和特性:
install-package Thinktecture.IdentityModel.Owin.ResourceAuthorization.Mvc然后我们在Home的Contact操作上添加特性,标记这个操作会读取(read) 联系人详情(contactDetaisl)资源:
[ResourceAuthorize("Read", "ContactDetails")]
public ActionResult Contact()
{
    ViewBag.Message = "Your contact page.";

    return View();
}注意这个特性不是标记谁允许读联系人信息 --- 具体的授权管理(操作、资源和谁能够操作这些资源)从应用中分离到AuthorizationManager啦。
public class AuthorizationManager : ResourceAuthorizationManager
{
    public override Task<bool> CheckAccessAsync(ResourceAuthorizationContext context)
    {
        switch (context.Resource.First().Value)
        {
            case "ContactDetails":
                return AuthorizeContactDetails(context);
            default:
                return Nok();
        }
    }

    private Task<bool> AuthorizeContactDetails(ResourceAuthorizationContext context)
    {
        switch (context.Action.First().Value)
        {
            case "Read":
                return Eval(context.Principal.HasClaim("role", "Geek"));
            case "Write":
                return Eval(context.Principal.HasClaim("role", "Operator"));
            default:
                return Nok();
        }
    }
}最后我们把授权管理放到Startup的OWIN的管道中去:
app.UseResourceAuthorization(new AuthorizationManager());调试下这个例子,单步跟随代码,了解一下整个认证授权过程。
角色授权
注意,如果你选择角色授权[Authorize(Roles = "Foo,Bar")], 当前用户被认证但未授权角色的时候,有可能会进入一种重定向死循环。因为Authroize特性发现访问用户被认证但未授权, 会让操作返回401未授权,401未授权会重定向到认证服务器(IdentityServer), 而认证服务器又会认证这个用户并重定向回去。噢哦,重定向死循环开始啦。。。。
这个问题可以通过重载Authrize特性的 HandleUnauthorizedRequest方法来解决。代码如下:
// 定制授权特性 Customized authorization attribute:
public class AuthAttribute : AuthorizeAttribute
{
    protected override void HandleUnauthorizedRequest(AuthorizationContext filterContext)
    {
        if (filterContext.HttpContext.User.Identity.IsAuthenticated)
        {
            // 403 我们知道你是谁,但是你无权访问
            filterContext.Result = new HttpStatusCodeResult(System.Net.HttpStatusCode.Forbidden);
        }
        else
        {
            // 401 你是谁?请登陆后再试
            filterContext.Result = new HttpUnauthorizedResult();
        }
    }
}

// Usage:
[Auth(Roles = "Geek")]
public ActionResult About()
{
    // ...
}
更多的授权和拒绝访问场景
让我们在Home控制器上加一个新的操作,进一步探索授权过程:
[ResourceAuthorize("Write", "ContactDetails")]
public ActionResult UpdateContact()
{
    ViewBag.Message = "Update your contact details!";

    return View();
}
当你访问 /home/updatecontact URL 你会看到禁止页面。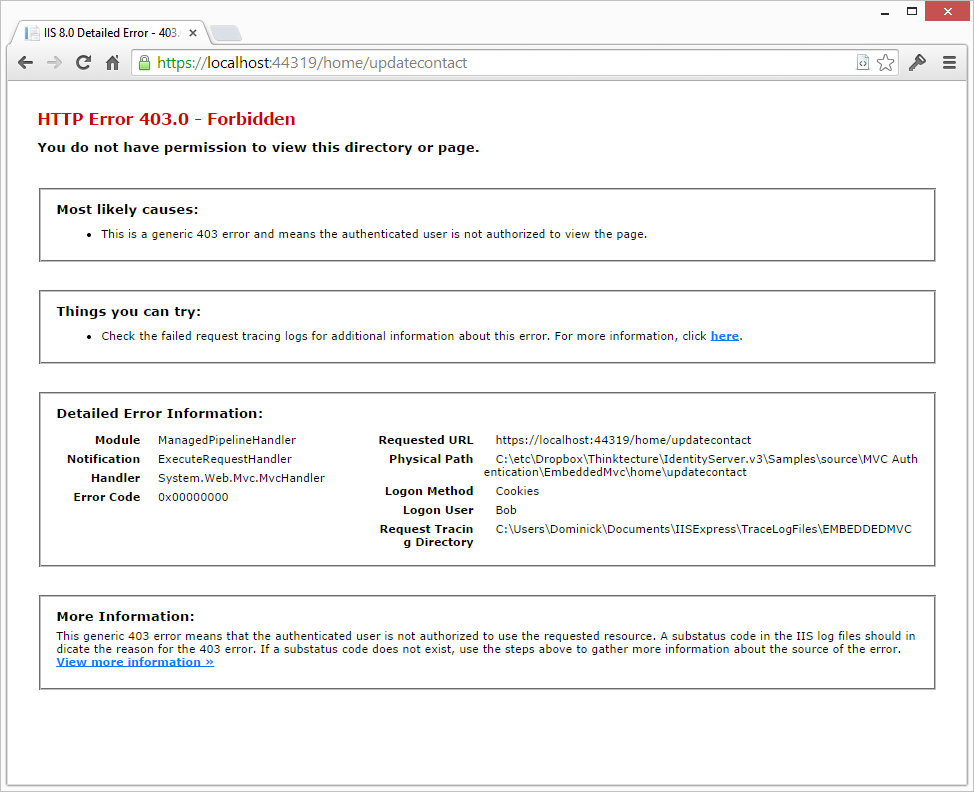
实际上会有不同的响应,如果你已经登陆,那么你会看到上述的禁止页面,否则,你会被重定向到登陆页面。这是认证授权设计好的流程(进一步学习请看这里).
可以通过检查403状态码来处理禁止情况---我们提供了一个现成的filter,代码如下:
[ResourceAuthorize("Write", "ContactDetails")]
[HandleForbidden]
public ActionResult UpdateContact()
{
    ViewBag.Message = "Update your contact details!";

    return View();
}
HandleForbidden filter(可以作用在全局)会把未授权的访问(403)重定向到一个特殊的视图----默认会得到一个禁止视图。
译者注需要在view的shared目录下创建一个Forbidden.cshtml视图,否则会报告404错误。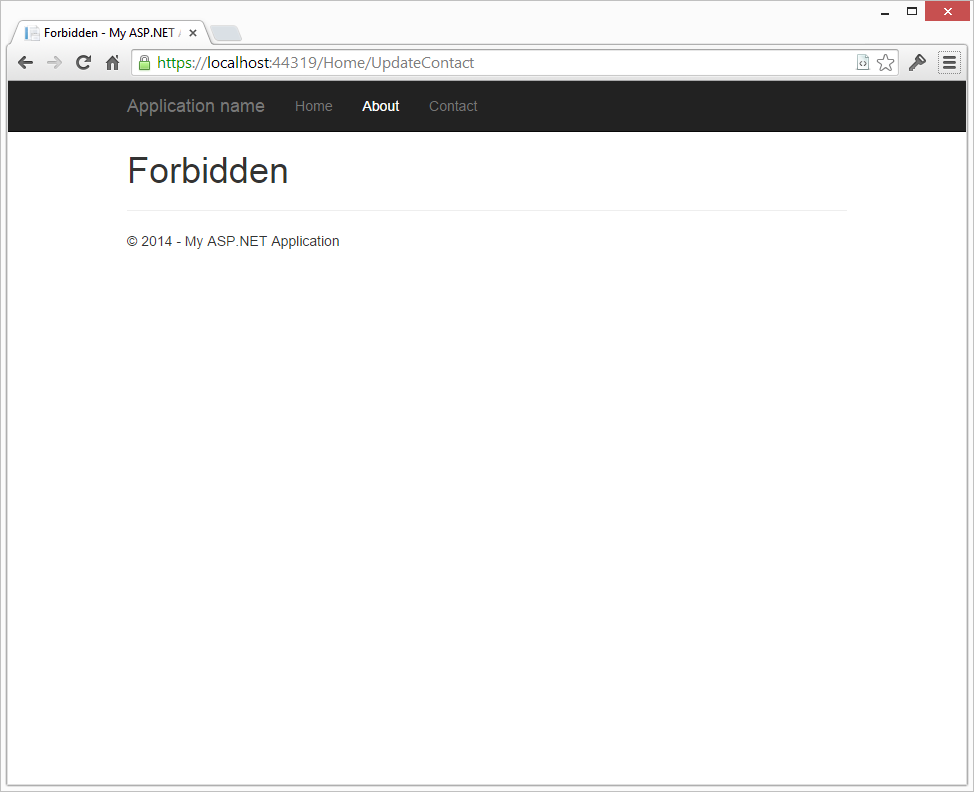
更好的办法是使用authroization manager进行精细控制:
[HandleForbidden]
public ActionResult UpdateContact()
{
    if (!HttpContext.CheckAccess("Write", "ContactDetails", "some more data"))
    {
        // either 401 or 403 based on authentication state
        return this.AccessDenied();
    }

    ViewBag.Message = "Update your contact details!";
    return View();
}
增加登出功能
在操作中调用katana认证的Signout方法就可以登出,非常简单明了。
public ActionResult Logout()
{
    Request.GetOwinContext().Authentication.SignOut();
    return Redirect("/");
}Signout方法调用 IdentityServer的 endsession 的方法,这个方法会清除认证cookie和结束当前session。

一般来说,登出时应该关闭浏览器,清除所有的会话数据。有一些应用则希望用户登出的时候,以一个匿名用户继续留在网站。通过简单几步就可以达到这个目的,首先注册一个有效的URL作为登出完成后的地址。这个在MVC应用的Client中定义: (注意新的 PostLogoutRedirectUris 设置):
new Client
{
    Enabled = true,
    ClientName = "MVC Client",
    ClientId = "mvc",
    Flow = Flows.Implicit,

    RedirectUris = new List<string>
    {
        "https://localhost:44387/"
    },
    PostLogoutRedirectUris = new List<string>
    {
        "https://localhost:44387/"
    }
}
接下来,客户端需要把登陆时得到的token 发送给登出方法,以便我们重定向到正确的URL上(不是垃圾邮件地址或者钓鱼地址)。之前的代码我们丢弃了这个token,现在我们要改变声明转换逻辑来保存它。
这个需要通过在SecurityTokenValidated通知里面增加一行代码来实现。
// keep the id_token for logout
nid.AddClaim(new Claim("id_token", n.ProtocolMessage.IdToken));
最后一步,我们通过OIDC中间件的通知机制,登出时把id_token发送到identityServer。
RedirectToIdentityProvider = n =>
    {
        if (n.ProtocolMessage.RequestType == OpenIdConnectRequestType.LogoutRequest)
        {
            var idTokenHint = n.OwinContext.Authentication.User.FindFirst("id_token");

            if (idTokenHint != null)
            {
                n.ProtocolMessage.IdTokenHint = idTokenHint.Value;
            }
        }

        return Task.FromResult(0);
}经过上面的改变以后,IdentityServer将显示一个链接给用户,通过这个链接可以回到最初的Web应用: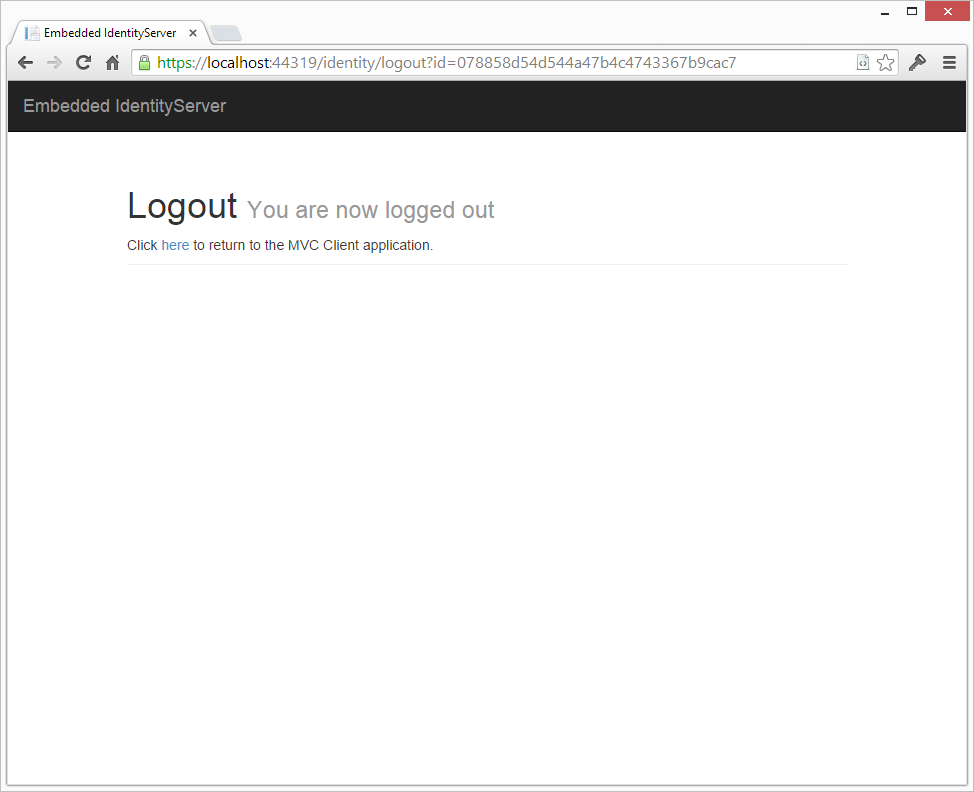
Tip 在 IdentityServerOptions上面,有一个 AuthenticationOptions 对象. 这个对象有一个属性EnablePostSignOutAutoRedirect. 和你想的一样, 把他设置为true,登出时会自动重定向,不需要用户点击链接。
增加Google账号认证
现在我们要提供第三方认证功能,首先添加一个katana认证中间件给IdentityServer--这里我们使用Google。
在Google登记我们的IdentityServer
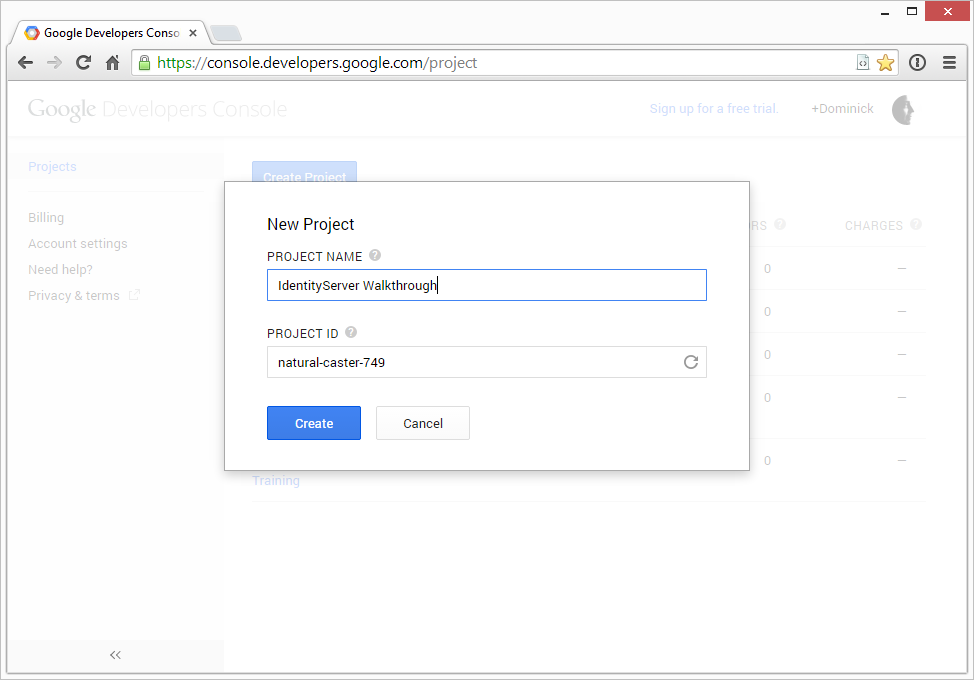
我们必须在Google的开发者控制面板中登记我们的IdentityServer,按照下面的流程一步步做就好。
打开新的浏览器,转到下面的链接:
https://console.developers.google.com
创建一个新项目
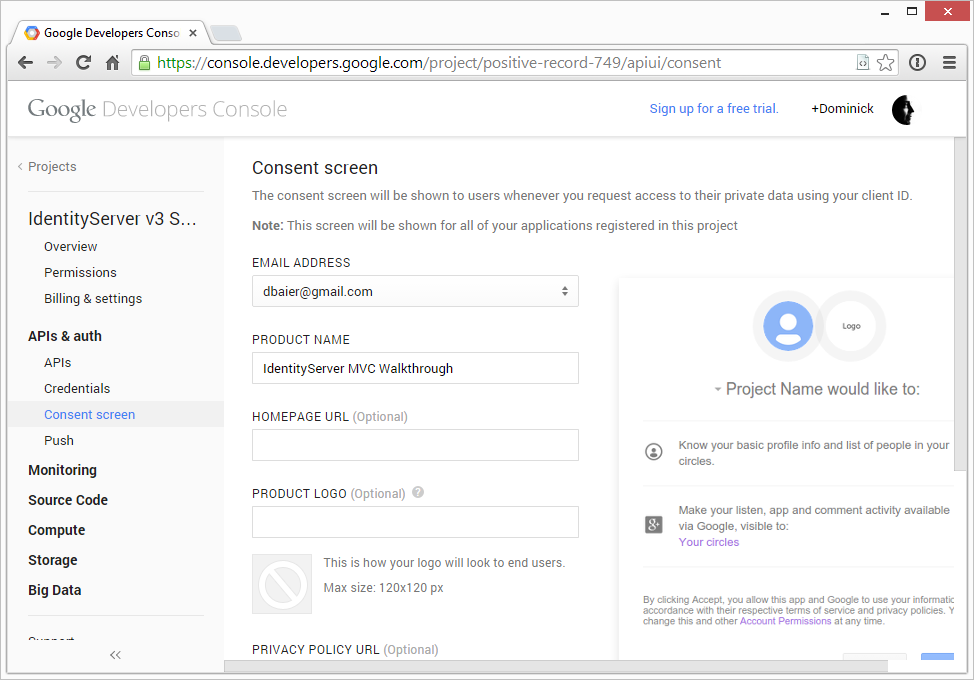
在同意界面填写邮件地址和产品名称
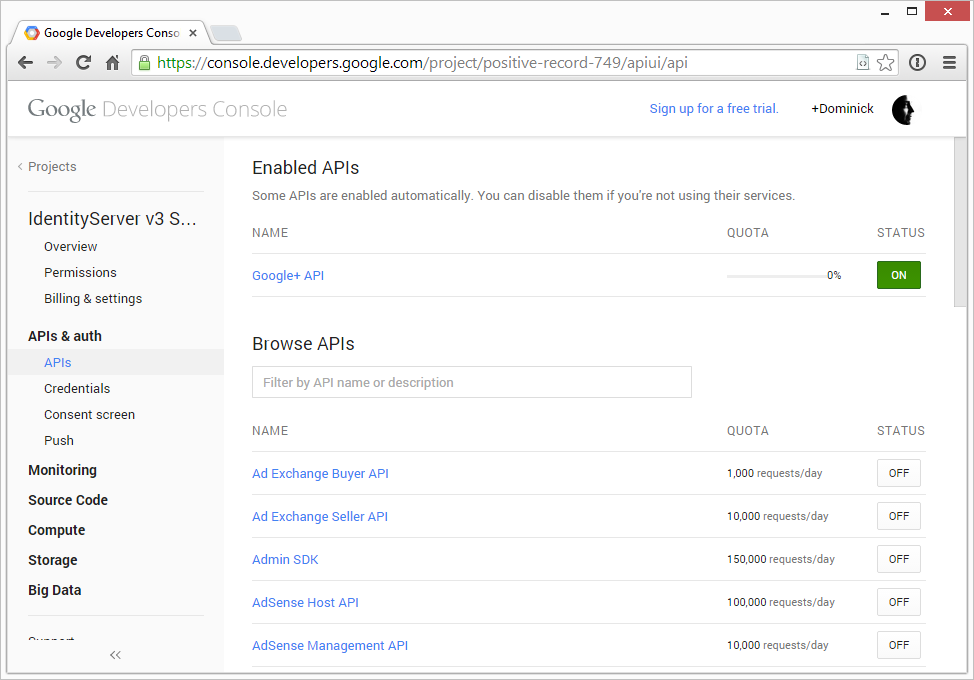
创建应用程序
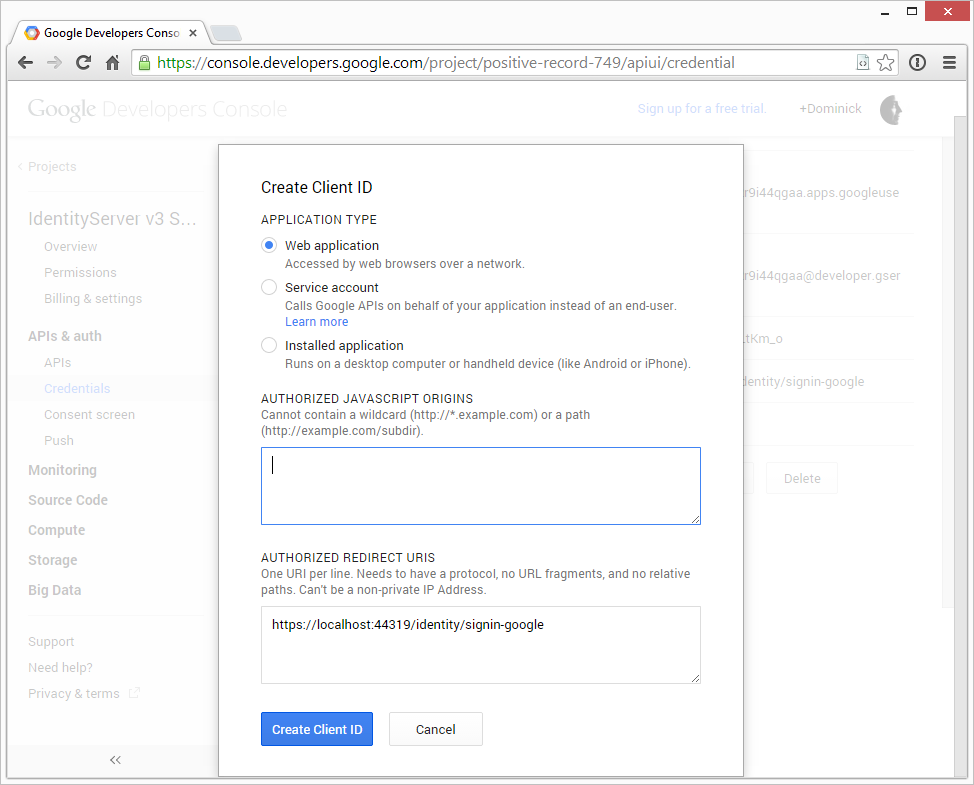
单击创建用户ID后,你会得到一个客户id(Client id)和客户密钥(client secret).保存好他们,在配置google认证中间件的时候我们需要用到他们。
增加Google认证中间件
通过Nuget程序包管理器控制台添加Google中间件:
install-package Microsoft.Owin.Security.Google
配置中间件
在Startup中添加下述方法:
注意:需要用刚才的客户Id和密钥替换代码中的...
private void ConfigureIdentityProviders(IAppBuilder app, string signInAsType)
{
    app.UseGoogleAuthentication(new GoogleOAuth2AuthenticationOptions
        {
            AuthenticationType = "Google",
            Caption = "Sign-in with Google",
            SignInAsAuthenticationType = signInAsType,

            ClientId = "...",
            ClientSecret = "..."
        });
}然后我们把IdentityServer的认证选项指向这个方法
Next we point our IdentityServer options class to this method:
idsrvApp.UseIdentityServer(new IdentityServerOptions
{
    SiteName = "Embedded IdentityServer",
    SigningCertificate = LoadCertificate(),

    Factory = new IdentityServerServiceFactory()
        .UseInMemoryUsers(Users.Get())
        .UseInMemoryClients(Clients.Get())
        .UseInMemoryScopes(Scopes.Get()),

    AuthenticationOptions = new IdentityServer3.Core.Configuration.AuthenticationOptions
    {
        IdentityProviders = ConfigureIdentityProviders
    }
});
代码修改完成,下一次用户登录时,你会看到右边有一个"Sign-in with google"的选项: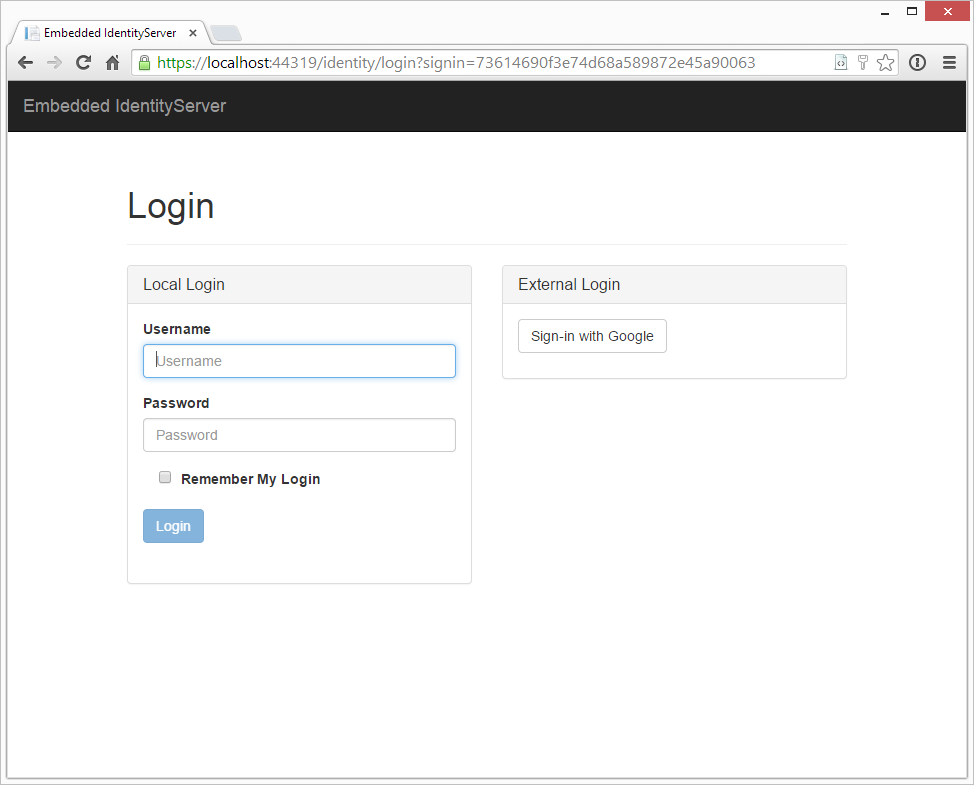
注意使用Google登陆没有角色声明信息,因为google本身没有角色概念。 在接受第三方认证时,需要考虑第三方给的声明信息可能不全。
第二节- WebAPI支持
这一节,我们将增加一个Web API项目到解决方案中去。这个API由IdentityServer保护。我们的MVC应用会使用可信子系统和代理认证方法来调用这个API。
添加 Web API 项目
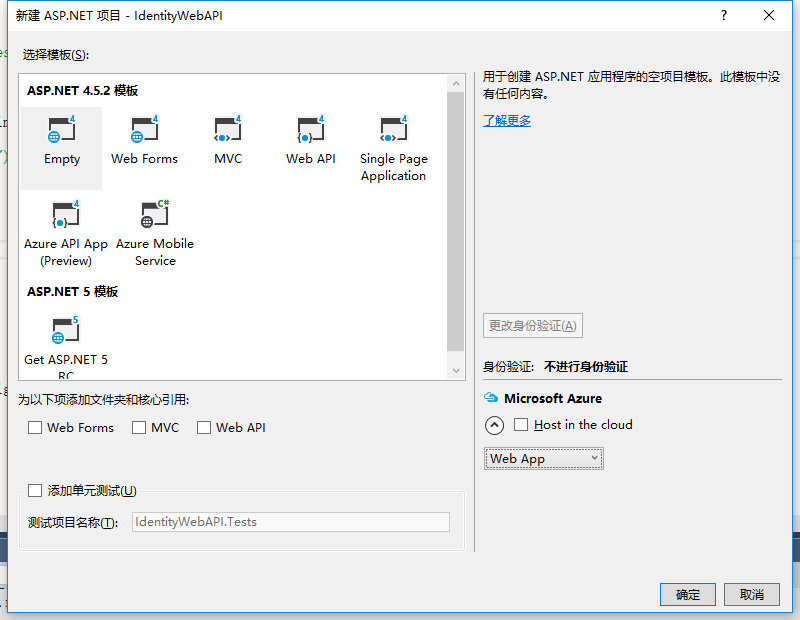
最简单的增加API项目的方式是添加一个空Web项目
通过Nuget增加WebAPI和Katana的支持:
install-package Microsoft.Owin.Host.SystemWeb
install-package Microsoft.Aspnet.WebApi.Owin
添加一个测试控制器
下面这个控制器会返回所有的声明信息给调用者--我们可以通过这个方法得到token所包含的信息。
[Route("identity")]
[Authorize]
public class IdentityController : ApiController
{
    public IHttpActionResult Get()
    {
        var user = User as ClaimsPrincipal;
        var claims = from c in user.Claims
                        select new
                        {
                            type = c.Type,
                            value = c.Value
                        };

        return Json(claims);
    }
}
在Startup中连接Web API 和 Security
在所有基于katana的应用,配置都发生在Startup中。
public class Startup
{
    public void Configuration(IAppBuilder app)
    {
        // web api configuration
        var config = new HttpConfiguration();
        config.MapHttpAttributeRoutes();

        app.UseWebApi(config);
    }
}
我们希望用IdentityServer来保护我们的API---需要实现两件事:
- 只接受来自IdentityServer的令牌
- 只接受给API的令牌 - 为了实现这一点,我们给API接口一个名字sampleApi(也叫
作用域)
To accomplish that, we add a Nuget packages:
为了达到这个目标,我们需要安装一个Nuget包:
install-package IdentityServer3.AccessTokenValidation..并在Startup中使用他们:
public class Startup
{
    public void Configuration(IAppBuilder app)
    {
        app.UseIdentityServerBearerTokenAuthentication(new IdentityServerBearerTokenAuthenticationOptions
        {
            Authority = "https://localhost:44319/identity",
            RequiredScopes = new[] { "sampleApi" }
        });

        // web api configuration
        var config = new HttpConfiguration();
        config.MapHttpAttributeRoutes();

        app.UseWebApi(config);
    }
}
注意
IdentityServer发送标准的JWT(JSON Web Tokens),你也可以用无格式的katana JWT中间件来验证他们。上面安装的中间件自动用IdentityServer的自动发现文档(metadata)来配置自己,用起来比较方便。
在IdentityServer中注册API
接下来,我们需要注册这个API--通过扩展作用域来实现,这次我们增加一个资源作用域:
public static class Scopes
{
    public static IEnumerable<Scope> Get()
    {
        var scopes = new List<Scope>
        {
            new Scope
            {
                Enabled = true,
                Name = "roles",
                Type = ScopeType.Identity,
                Claims = new List<ScopeClaim>
                {
                    new ScopeClaim("role")
                }
            },
            new Scope
            {
                Enabled = true,
                DisplayName = "Sample API",
                Name = "sampleApi",
                Description = "Access to a sample API",
                Type = ScopeType.Resource
            }
        };

        scopes.AddRange(StandardScopes.All);

        return scopes;
    }
}
注册web api客户端
下面我们要调用这个API,你可以使用客户端证书(作为一个服务账号),或者使用用户身份。
我们首先使用客户端证书
第一步,我们注册为MVC 应用一个新的客户,因为安全方面的原因,IdentityServer 只允许每个客户一个flow。
而我们当前的MVC客户端已经使用隐式flow,所以我们需要为服务到服务的通信创建一个新的客户。
public static class Clients
{
    public static IEnumerable<Client> Get()
    {
        return new[]
        {
            new Client
            {
                ClientName = "MVC Client",
                ClientId = "mvc",
                Flow = Flows.Implicit,

                RedirectUris = new List<string>
                {
                    "https://localhost:44319/"
                },
                PostLogoutRedirectUris = new List<string>
                {
                    "https://localhost:44319/"
                },
                AllowedScopes = new List<string>
                {
                    "openid",
                    "profile",
                    "roles",
                    "sampleApi"
                }
            },
            new Client
            {
                ClientName = "MVC Client (service communication)",
                ClientId = "mvc_service",
                Flow = Flows.ClientCredentials,

                ClientSecrets = new List<Secret>
                {
                    new Secret("secret".Sha256())
                },
                AllowedScopes = new List<string>
                {
                    "sampleApi"
                }
            }
        };
    }
}
备注 上面的代码片段通过AllowdScopes设置,限制了不同的客户端可以访问的作用域。
调用API
调用这个API由两部分组成:
- 使用客户证书从IdentityServer获得访问令牌。
- 使用访问令牌调用API
下面的nuget包可以简化OAuth2的交互,把它安装到MVC项目下:(注意不是webapi项目)
install-package IdentityModel在MVC的Controllers目录下增加一个新的类 CallApiController. 下面的代码片段使用服务端客户凭据获得sampleApi的访问令牌。
private async Task<TokenResponse> GetTokenAsync()
{
    var client = new TokenClient(
        "https://localhost:44319/identity/connect/token",
        "mvc_service",
        "secret");

    return await client.RequestClientCredentialsAsync("sampleApi");
}
下面的代码片段使用访问令牌调用web Api获得identity信息:
private async Task<string> CallApi(string token)
{
    var client = new HttpClient();
    client.SetBearerToken(token);

    var json = await client.GetStringAsync("https://localhost:44321/identity");
    return JArray.Parse(json).ToString();
}加上一个视图和对应的控制方法,调用上述辅助方法,一个新的显示声明的操作就okay啦。代码如下:
public class CallApiController : Controller
{
    // GET: CallApi/ClientCredentials
    public async Task<ActionResult> ClientCredentials()
    {
        var response = await GetTokenAsync();
        var result = await CallApi(response.AccessToken);

        ViewBag.Json = result;
        return View("ShowApiResult");
    }

    // helpers omitted
}创建一个ShowApiResult.cshtml 文件, 简单的显示结果的视图:
<h2>Result</h2>

<pre>@ViewBag.Json</pre>
访问这个URL,结果如下:
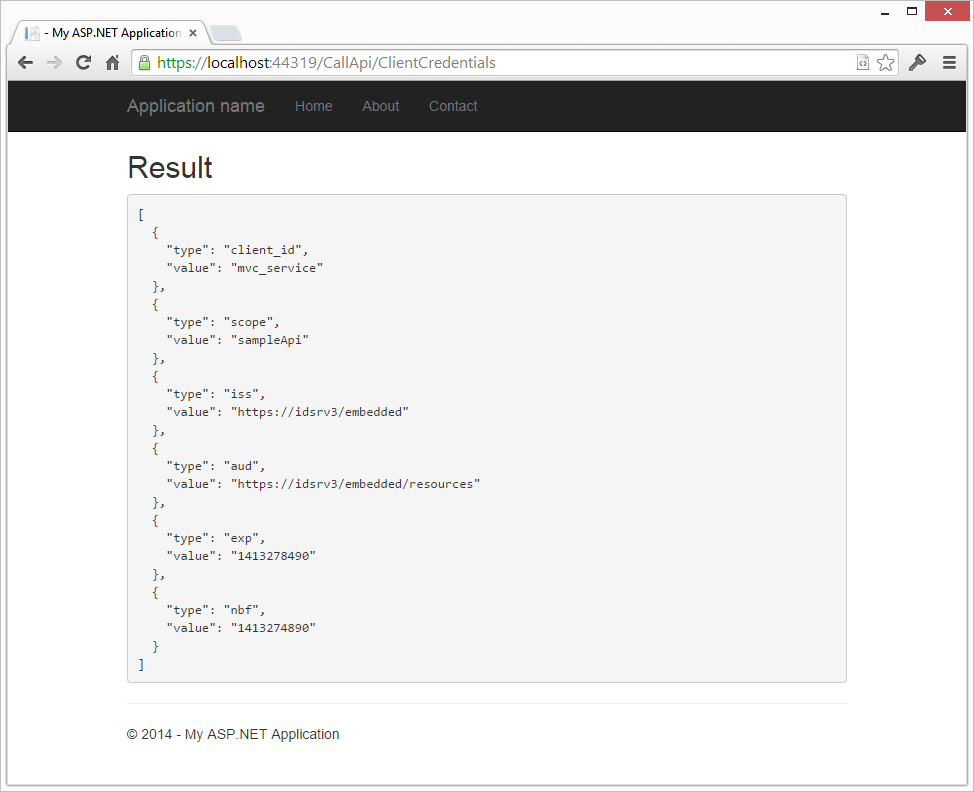
换句话说,API知道调用者的信息:
- 发布者信息,听众和过期时间(通过令牌验证中间件)
- 令牌在那个作用域里面有效(通过作用域验证中间件)
- 客户端ID
令牌包含的所有声明信息会保存到ClaimsPrincipal,可以通过.User属性查看,使用。
使用登录用户的权限信息
现在我们使用登录者的权限信息调用WebAPI。在OpenID 连接中间件作用域上面配置上sampleAPI, 同时在期望响应类型上加上 token,要求认证服务器返回访问令牌。
Scope = "openid profile roles sampleApi",
ResponseType = "id_token token"为了优化效率,IdentityServer发现请求包括访问token后,会把声明从标识令牌中移除,这样可以减小标识令牌的大小。有了访问令牌后,声明信息可以从用户信息接口获取。
从用户信息结构获取声明很简单,UserInfoClient类简化了操作。另外,我们把访问令牌放到cookie里面,要访问API的时候,我们从cookie中获取,而不用每次都去认证服务器认证。
译者注 :标识令牌在每次调用webapi或者请求页面时都要从客户端发到服务器端,太大会影响通讯效率。
SecurityTokenValidated = async n =>
    {
        var nid = new ClaimsIdentity(
            n.AuthenticationTicket.Identity.AuthenticationType,
            Constants.ClaimTypes.GivenName,
            Constants.ClaimTypes.Role);

        // get userinfo data
        var userInfoClient = new UserInfoClient(
            new Uri(n.Options.Authority + "/connect/userinfo"),
            n.ProtocolMessage.AccessToken);

        var userInfo = await userInfoClient.GetAsync();
        userInfo.Claims.ToList().ForEach(ui => nid.AddClaim(new Claim(ui.Item1, ui.Item2)));

        // keep the id_token for logout
        nid.AddClaim(new Claim("id_token", n.ProtocolMessage.IdToken));

        // add access token for sample API
        nid.AddClaim(new Claim("access_token", n.ProtocolMessage.AccessToken));

        // keep track of access token expiration
        nid.AddClaim(new Claim("expires_at", DateTimeOffset.Now.AddSeconds(int.Parse(n.ProtocolMessage.ExpiresIn)).ToString()));

        // add some other app specific claim
        nid.AddClaim(new Claim("app_specific", "some data"));

        n.AuthenticationTicket = new AuthenticationTicket(
            nid,
            n.AuthenticationTicket.Properties);
}练习:请重新配置IdentityServer,设置作用域声明的AlwaysIncludeInIdToken强制包括一些声明在标识令牌中,无论IdentityServer是否优化令牌访问。
调用API
我们现在把访问令牌保存到了cookie中,我们可以从声明对象(claims principal)中取出令牌,并用这个令牌调用服务。
// GET: CallApi/UserCredentials
public async Task<ActionResult> UserCredentials()
{
    var user = User as ClaimsPrincipal;
    var token = user.FindFirst("access_token").Value;
    var result = await CallApi(token);

    ViewBag.Json = result;
    return View("ShowApiResult");
}登陆后,转到UserCredentials页面,你会看到sub信息,说明你现在是使用用户的权限在访问API。
译者注:sub是用户的唯一标识, 之前使用特定客户端的权限的时候,是没有这个标识的。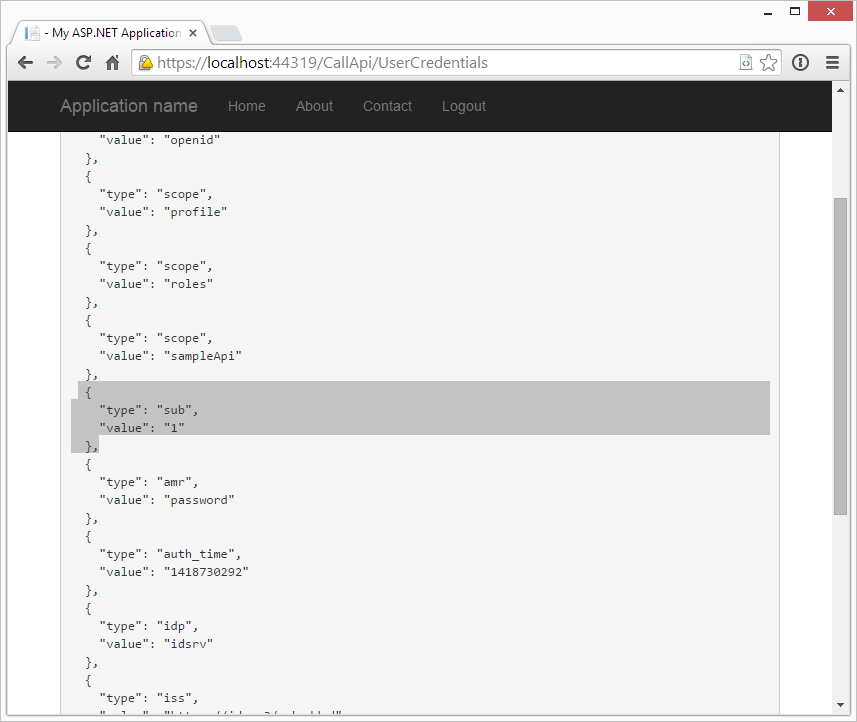
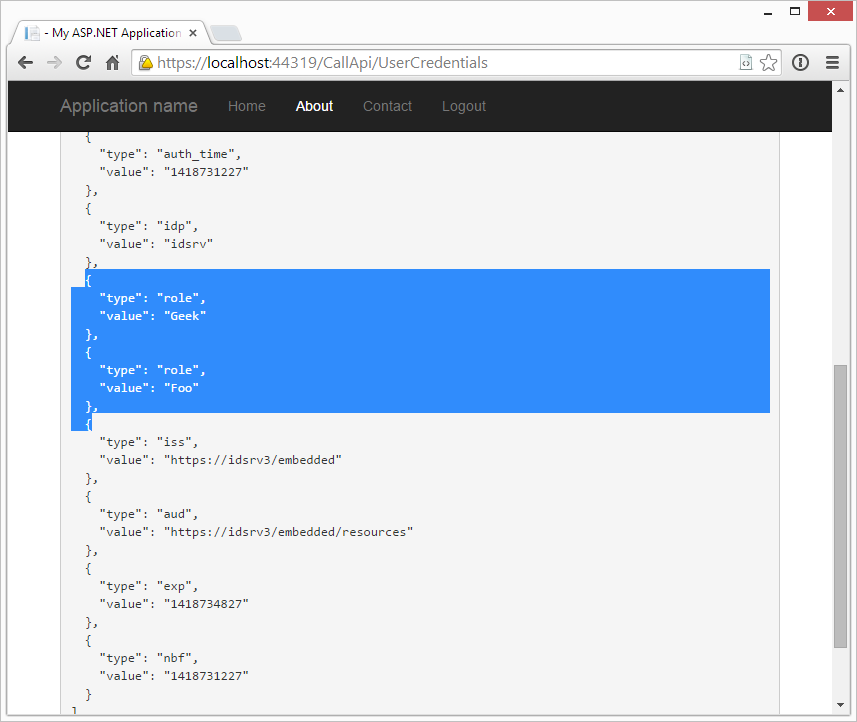
现在可以增加一个role的作用域声明到sampleApi作用域中。--用户角色将会包括在访问令牌中。
new Scope
{
    Enabled = true,
    DisplayName = "Sample API",
    Name = "sampleApi",
    Description = "Access to a sample API",
    Type = ScopeType.Resource,

    Claims = new List<ScopeClaim>
    {
        new ScopeClaim("role")
    }
}
评论列表